TS-WXLに実装のMySQLを使う(1) [MySQL]
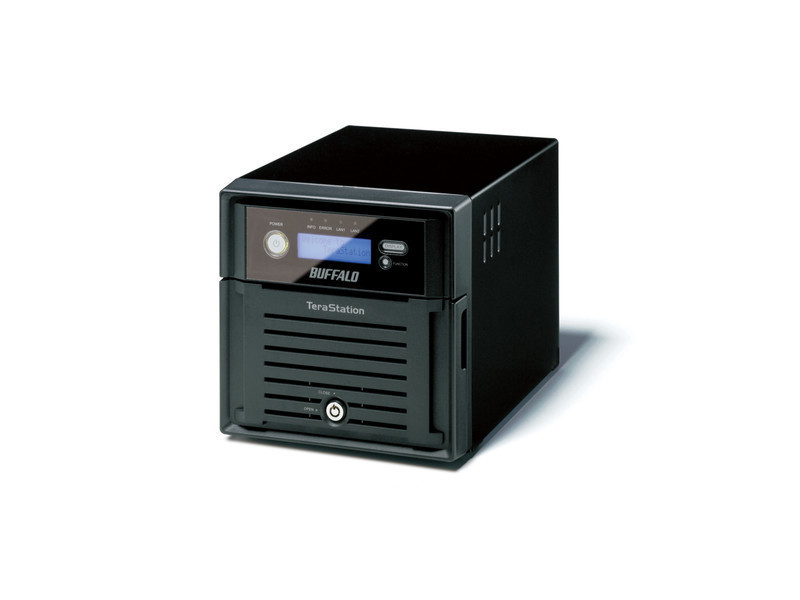
※ BuufaloのWebサイトより引用
オークションで入手したTS-WXLは、WebサーバーやMySQLサーバーの機能が実装されているので、 MySQLの勉強のために色々と弄ってみる。
まずは、準備編。
TS-TXLのWeb管理画面で設定しておく。
①「MySQLサーバー機能」を「使用する」に設定する。
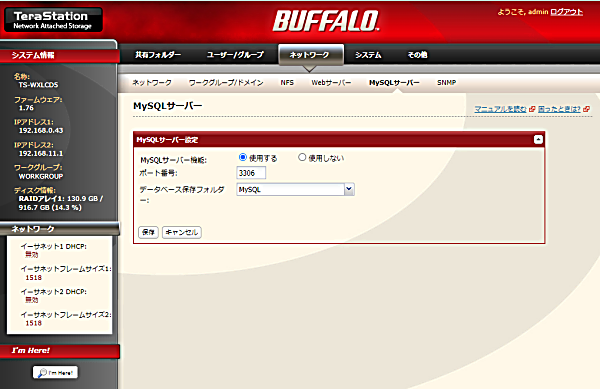
②「phpMyAdminを開く」を押すと、phpMyAdminのログイン画面が出る。
「phpMyAdminを開く」がグレイアウトしているときは、ログイン画面は出ない。
※ phpMyAdminでは、WebでMySQLサーバーの設定やメンテナンスができる。
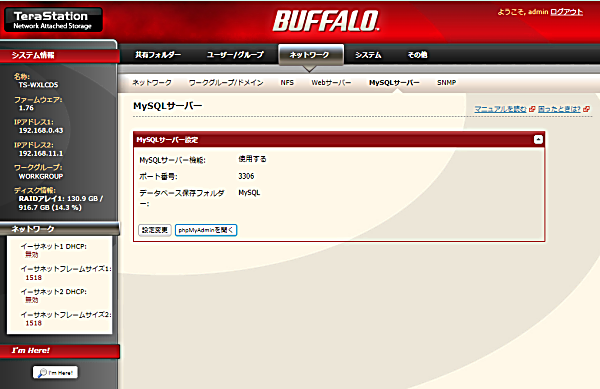
phpMyAdminのログイン画面 初期では、ID:admin PW:password
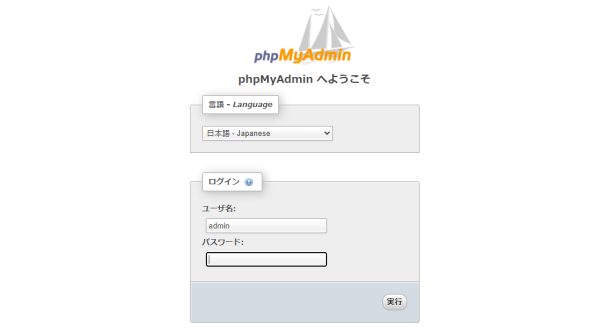
「Webサーバー機能」を「使用する」に設定すると、「phpMyAdminを開く」が押せるようになる。
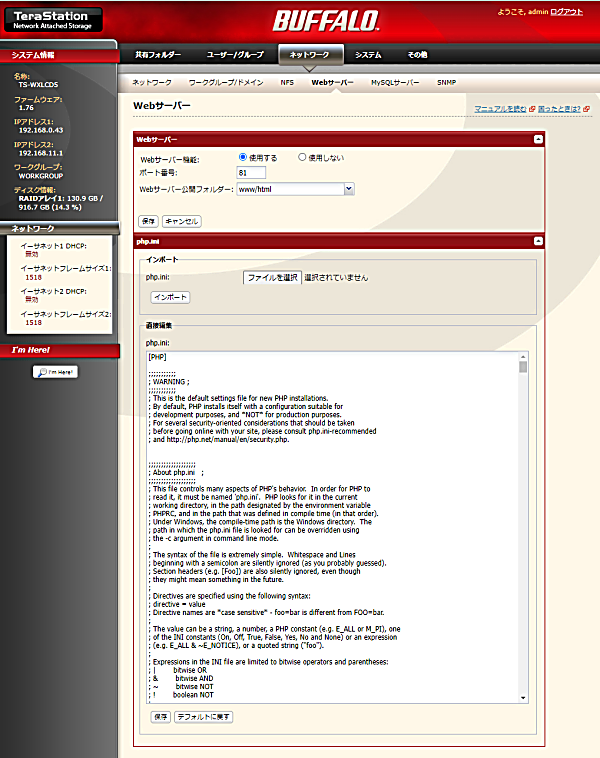
参考リンク
https://kb.tableau.com/articles/Issue/error-mysql-odbc-5-3-w-driver-unknown-character-set-utf8mb4-when-connecting-to-mysql?lang=ja
TeraStation telnet [LinkStation/TeraStation]

※ BuufaloのWebサイトより引用
LinkStation LS-WHTLと同じな「java -jar acp_commander.jar -t 192.168.0.43 -o」では だめ(rootのパスワードが残る)のようなので違う方法で...
acp_commander のコマンドモードを使い、/etc/shadow (Shadowパスワード)の
パーミッションを変えて、削除する。
※ acp_commanderの保存先:C:\Users\User\Desktop\TS-WXL、
IPアドレス:192.168.0.43、macアドレス:00:1D:73:E7:6C:D5、
adminのパスワード:adminPasswd など、固有の情報は仮のものです。
①まずは、コマンドプロンプトで以下を実行。
--------------------------------------------------------------------------------------------------------------
C:\Users\User\Desktop\TS-WXL> java -jar acp_commander.jar -t 192.168.0.43 -ip 192.168.0.43 -pw adminPasswd -s
ACP_commander out of the nas-central.org (linkstationwiki.net) project.
Used to send ACP-commands to Buffalo linkstation(R) LS-PRO.
WARNING: This is experimental software that might brick your linkstation!
Using random connID value = 50FA1AB3525B
Using target: TS-WXLCD5/192.168.0.43
Starting authentication procedure...
Sending Discover packet...
Found: TS-WXLCD5 (/192.168.0.43) TS-WXL(tsukuba) (ID=003212) mac: 00:1D:73:E7:6C:D5 Firmware= 1.760
Key=290DA543
Trying to authenticate EnOneCmd... ACP_STATE_OK
Trying to authenticate with admin password... ACP_STATE_OK
Enter telnet commands to LS, enter 'exit' to leave
/root>chmod 666 /etc/shadow
OK (ACP_STATE_OK)
>
>exit
Changeing IP: ACP_STATE_PASSWORD_ERROR
Please note, that the current support for the change of the IP is currently very rudimentary.
The IP has been set to the given, fixed IP, however DNS and gateway have not been set. Use the WebGUI to make appropriate settings.
C:\Users\User\Desktop\TS-WXL>
再起動しておく。
--------------------------------------------------------------------------------------------------------------
②admin で telnet 接続し、root のパスワードを消す。
--------------------------------------------------------------------------------------------------------------
BUFFALO INC. TeraStation series
TS-WXLCD5 login: admin
Password:adminPasswd
Last login: Sun Apr 30 19:06:42 JST 2023 on pts/0
-sh: /etc/profile: Permission denied
-sh-3.2$ vi /etc/shadow
viで1行目のパスワードを、
root:$1$S3IeVE7t$1LiWuOgI1tyShTpPl742a.:19506:0:99999:7:::
以下のように「空」の設定に修正する。
root::11009:0:99999:7:::
:w! で上書き保存する。
cat で修正結果を確認する。
-sh-3.2$ cat /etc/shadow
root::11009:0:99999:7:::
bin:*:11009:0:99999:7:::
daemon:*:11009:0:99999:7:::
halt:*:11009:0:99999:7:::
ftp:*:11009:0:99999:7:::
rpc:*:11009:0:99999:7:::
rpcuser:*:11009:0:99999:7:::
apache:*:11009:0:99999:7:::
admin:$1$sl0Bm/vh$cjHN7QBArdr1cJ8lENWFt.:19171:0:99999:7:::
sshd:!:13241:0:99999:7:::
nobody:!:13148:0:99999:7:::
guest:!:13148:0:99999:7:::
mysql:!:15033::::::
-sh-3.2$ exit
--------------------------------------------------------------------------------------------------------------
③rootでログオン(rootのパスワードは空)し、最終調整する。
--------------------------------------------------------------------------------------------------------------
BUFFALO INC. TeraStation series
TS-WXLCD5 login: root
Last login: Sun Apr 30 19:07:02 JST 2023 on pts/0
root@TS-WXLCD5:~#
rootでログインできた。
/etc/shadow のパーミッションを644に戻しておく。
root@TS-WXLCD5:~# chmod 644 /etc/shadow
後は、passwdコマンドで、自分が考えたrootパスワードを設定しておくなど。
以上
【参考】
--------------------------------------------------------------------------------------------------------------
C:\Users\User\Desktop\TS-WXL> java -jar acp_commander.jar
ACP_commander out of the nas-central.org (linkstationwiki.net) project.
Used to send ACP-commands to Buffalo linkstation(R) LS-PRO.
WARNING: This is experimental software that might brick your linkstation!
Version 0.4.1 (beta)
Usage: acp_commander [options] -t target
options are:
-t target .. IP or network name of the Linkstation.
-m MAC ... define targets mac address set in the ACP package.
-na ... no authentication, skip the ACP_AUTH packet.
-ba ... use bug/bufferoverflow on LS to bypass password authent.
-pw passwd . your LS admin password.
-i ID ... define a connection identifier, standard: random value.
-p port ... define alternative target port, default = 22936
-b localIP.. bind to local address.
-f ... find linkstation(s).
-o ... open the linkstation by sending 'telnetd' and 'passwd -d root'.
-c cmd ... sends the given shell command cmd to the linkstation.
-s ... interactive shell.
-cb ... clear \boot, output of df follows for control of success.
-ip newIP... change IP to newIP, clears also admin password.
-save ... save configuration.
-load ... load configuration.
-blink ... blink LED's and play some tones.
-gui nr ... set Web GUI language 0=Jap, 1=Eng, 2=Ger.
-addons ... install addons.tar from local or linkstationwiki.
-diag ... run some diagnostics on LS settings (lang, backup).
-emmode ... Linkstation boots next into EM-mode.
-normmode .. Linkstation boots next into normal mode.
-reboot ... reboot Linkstation.
-shutdown .. shut Linkstation down.
-d1 | -d2 .. set debug level, generate additional output
-q ... quiet, surpress header, does not work with -h or -v
-h | -v ... extended help
-u ... usage (this output)
*) this is not the MAC address the packet is sent to, but the address within
the ACP packet. The linkstation will only react to ACP packets if they
carry the correct (its) MAC-address or FF:FF:FF:FF:FF:FF
This program is the result of the work done at nas-central.org (linkstationwiki.net),
which is not related with Buffalo(R) in any way.
Experimental software, use with care, it might brick your Linkstation!
C:\Users\User\Desktop\TS-WXL>


